February 9, 2023
It’s awesome you’re looking to grow mushrooms with wood pellets! Lets see the general procedures with Oyster mushrooms. Hardwood Pellets can be a great substrate for them. Here’s a breakdown of how to set it up:
1. Gather Your Supplies:
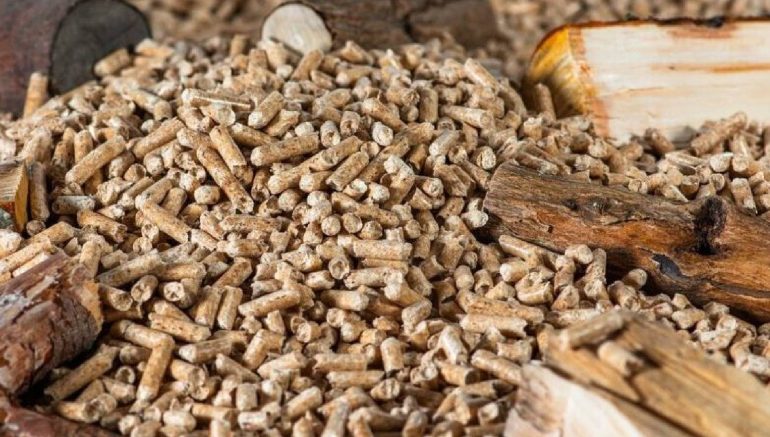
- Hardwood Pellets: Ensure they are 100% hardwood (like rubber or oak) with no additives. Avoid softwood (pine) pellets.
- Mushroom Spawn: You can find this online or at specialty gardening stores. It’s essentially grain colonized with oyster mushroom mycelium.
- Container: A bucket, plastic tote, or even a specialized PP5 bag with breathable filter will work. Make sure it’s clean!
- Water: Boiled, Clean, non-chlorinated water.
- Spray Bottle: For maintaining humidity.
2. Prepare the Wood Pellets:
- Hydrate: Add EXACTLY 1.5 Liters of boiling hot water inside the filter patch bag containing 1 Kg substrate pellets. This helps in pasteurizing and hydrating the substrate pellets. They will expand significantly. Fold the top of the bag and tape it down with a piece of cello tape.Wait for 5-6 hours while the bag cools down to room temperature and they’ve fully expanded and are crumbly..
3. Inoculate with Spawn:
- Mix in the Spawn: Sanitize your hands, scissors and work space with soap water any other disinfectant.Break up the spawn inside the packet and then cut open the packet using your scissors. Remove the tape on the cooled bag of substrate and add the spawn into it. Fold the top of the bag over itself and tape it shut using cello tape. Ensure that no air can enter or leave the bag as it can lead to contamination. Mix the spawn into the substrate from outside the bag using your hands. Aim for even distribution. A good ratio is about 5-10% spawn to substrate (e.g., 50-100g of spawn for 1kg of hydrated pellets).
- Pack Lightly: Gently pack the inoculated wood pellets into your container. Don’t compress it too tightly, as the mycelium needs air to breathe.
4. Create Fruiting Conditions:
- Humidity: Oyster mushrooms need high humidity to fruit. You can achieve this by misting the surroundings of the bag regularly.Using a humidifier in the room.
- Light: Oyster mushrooms don’t need a lot of light, but some indirect light can help trigger fruiting. A location near a window but out of direct sunlight is ideal.
- Temperature: Aim for a temperature between 60-75°F (15-24°C).
5. Wait and Watch:
- Colonization: The mycelium will start to colonize the wood pellets. You’ll see white, thread-like growth spreading throughout the substrate. This can take anywhere from a few days to a couple of weeks.
- Fruiting: Once the substrate is fully colonized, you’ll start to see small mushroom “pins” forming. These will rapidly grow into mature oyster mushrooms.
- Harvest: Harvest the mushrooms when the caps are still slightly curled downwards. You can gently twist or cut them off at the base.
Important Tips:
- Cleanliness: Maintain good hygiene throughout the process. Clean your hands and equipment to minimize the risk of contamination.
- Ventilation: Ensure adequate ventilation to prevent the buildup of carbon dioxide, which can inhibit fruiting.
- Patience: Growing mushrooms takes time and patience. Don’t get discouraged if you don’t see results immediately.
With a little care and attention, you’ll be enjoying fresh, homegrown oyster mushrooms in no time!
1. Gather Your Supplies:
- Hardwood Pellets: Ensure they are 100% hardwood (like oak or maple) with no additives. Avoid softwood (pine) pellets.
- Oyster Mushroom Spawn: You can find this online or at specialty gardening stores. It’s essentially grain colonized with oyster mushroom mycelium.
- Container: A bucket, plastic tote, or even a specialized mushroom grow bag will work. Make sure it’s clean!
- Water: Clean, non-chlorinated water.
- Spray Bottle: For maintaining humidity.
2. Prepare the Wood Pellets:
- Hydrate: This is crucial! Place the wood pellets in your container and add water. You’ll want to add enough water so that the pellets are fully submerged. They will expand significantly, so don’t overfill the container initially. Let them soak for several hours, or even overnight, until they’ve fully expanded and are crumbly.
- Drain Excess Water: Once the pellets are fully hydrated, drain off any excess water. You want them to be moist, but not soaking wet. Think of a wrung-out sponge.
3. Inoculate with Spawn:
- Mix in the Spawn: Crumble the oyster mushroom spawn and mix it thoroughly into the hydrated wood pellets. Aim for even distribution. A good ratio is about 5-10% spawn to substrate (e.g., 50-100g of spawn for 1kg of hydrated pellets).
- Pack Lightly: Gently pack the inoculated wood pellets into your container. Don’t compress it too tightly, as the mycelium needs air to breathe.
4. Create Fruiting Conditions:
- Humidity: Oyster mushrooms need high humidity to fruit. You can achieve this by:
- Placing the container in a large plastic bag or tote with a lid, and misting the inside of the bag regularly.
- Using a humidifier in the room.
- Air Exchange: While humidity is important, some fresh air is also necessary. Open the bag or container for a short period each day to allow for air exchange.
- Light: Oyster mushrooms don’t need a lot of light, but some indirect light can help trigger fruiting. A location near a window but out of direct sunlight is ideal.
- Temperature: Aim for a temperature between 60-75°F (15-24°C).
5. Wait and Watch:
- Colonization: The mycelium will start to colonize the wood pellets. You’ll see white, thread-like growth spreading throughout the substrate. This can take anywhere from a few days to a couple of weeks.
- Fruiting: Once the substrate is fully colonized, you’ll start to see small mushroom “pins” forming. These will rapidly grow into mature oyster mushrooms.
- Harvest: Harvest the mushrooms when the caps are still slightly curled downwards. You can gently twist or cut them off at the base.
Important Tips:
- Cleanliness: Maintain good hygiene throughout the process. Clean your hands and equipment to minimize the risk of contamination.
- Ventilation: Ensure adequate ventilation to prevent the buildup of carbon dioxide, which can inhibit fruiting.
- Patience: Growing mushrooms takes time and patience. Don’t get discouraged if you don’t see results immediately.
With a little care and attention, you’ll be enjoying fresh, homegrown oyster mushrooms in no time!